How to Use the Touch Up Pen Preferred KitUpdated 5 days ago
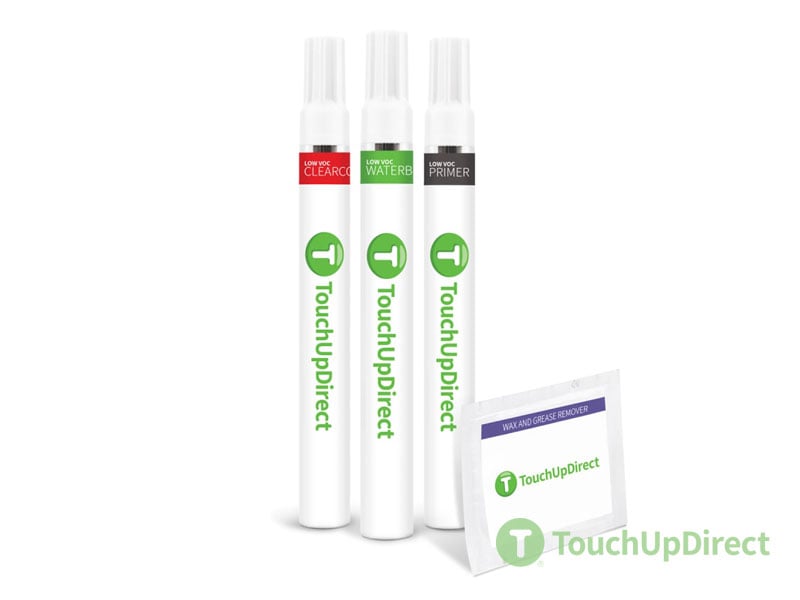
The Touch Up Pen Preferred Kit includes
The Pen Preferred Kit is designed for small scratches (under 0.25" wide) where the damage reaches bare metal or plastic. It includes Primer, Colorcoat, and Clearcoat. The Primer ensures proper paint adhesion and protects exposed surfaces, while the Clearcoat finishes the job with added durability and shine.
BEFORE YOU START
If the color doesn’t match, pause the application and contact us through our Color Match Guarantee for assistance.
Paint is best applied in temperatures around 70 degrees Fahrenheit. Do not apply in direct sunlight.
PART 1 - Prepare the Surface
Approximate time to complete*: 30-60 Minutes
What you need for PART 1:
- Soap and water
- Sandpaper (optional)
- Wax and grease remover
- Masking tape (optional)
Wash the entire area with soap and water to remove surface dirt. Rinse thoroughly and let it dry.
For small scratches, sanding is usually not required. Only sand if the surface feels uneven. Use light pressure and stay within the damaged area to avoid scuffing surrounding paint. (See: Sanding Instructions)
Clean and dry the surface again.
Use the Wax & Grease Remover Wipe to gently clean the area in one direction to remove any remaining contaminants.
(Optional) Tape off the area to protect surrounding surfaces during sanding and painting.
Check the damaged spot:
If bare metal or plastic is visible, Primer is required (continue to Part 2).
If the surface is already primed or not down to bare substrate, skip to Part 3 – Apply Colorcoat.
Before You Start Painting – Prime the Touch Up Pens
Before using any of the Touch Up Pens (Primer, Colorcoat, or Clearcoat), you’ll need to prime the pen tip:
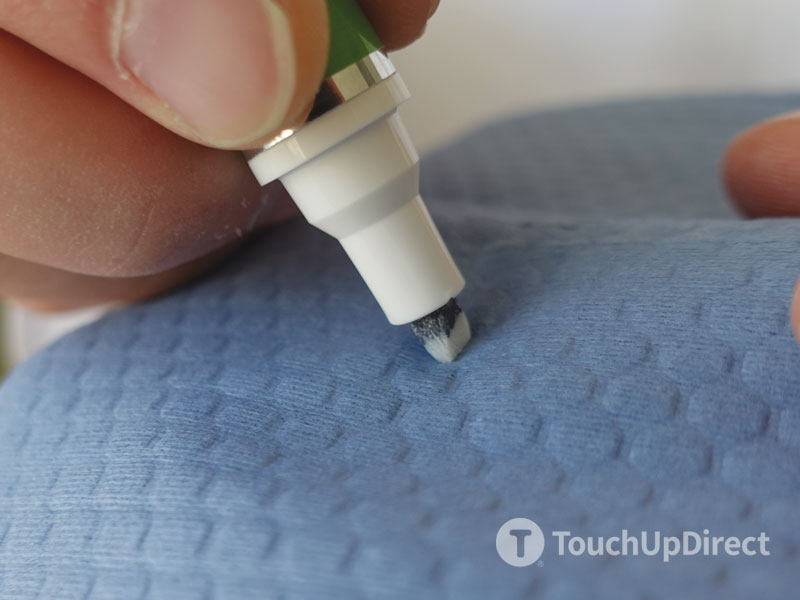
Remove the cap.
Press the tip down on a soft surface a few times until the tip is saturated (typically 3–5 pumps).
If excess paint builds up, gently wipe it off with a soft cloth.
Repeat this step for each pen before its first use.
PART 2 - Apply Primer
Approximate time to complete*: 30 Minutes
What you need for PART 2:
- Primer Touch Up Pen
Lightly dab Primer into the damaged area.
Let it dry, then apply a second coat.
Allow the Primer to dry fully—about 30 minutes.
(Optional) Wet-sand the area using 800-grit sandpaper. Keep both the surface and sandpaper wet, and sand only within the damaged area. The goal is to smooth the Primer without sanding beyond the repair spot.
PART 3 - Apply Colorcoat
Approximate time to complete*: 30 Minutes
What you need for PART 2:
Colorcoat Touch-Up Pen
*Tricoat colors include two Colorcoat pens: Basecoat and Midcoat
- Use the Wax & Grease Remover Wipe again, wiping in one direction.
- Shake the Colorcoat pen thoroughly.
- Lightly dab the Colorcoat (*Basecoat for Tricoat) onto the repaired area. Apply a thin, even coat and let it dry for 15 minutes.
- Repeat for 2–3 coats or until the area is fully covered.
- *For Tricoat colors, repeat steps 2–4 using the Midcoat pen.
- Recap the pen tightly after use to prevent drying.
PART 3 - Apply Clearcoat
Approximate time to complete*: 30 Minutes
What you need for PART 3:
- Clearcoat
- Dab on a light, even coat of Clearcoat. The first coat should have thorough, even coverage. Allow to dry for 15 minutes.
- Repeat step 2 for up to 4 total coats. Do not exceed four coats.
- Clearcoat will be dry enough to handle within 30 minutes of the last application. Allow it to dry for a full 48 hours before wet sanding, polishing, or waxing.
⚠⛔⚠ DO NOT wet sand or polish matte finish clearcoats — this will permanently damage the matte finish by making it glossy.
* Actual implementation times may vary